Fall is here and with the cool breeze comes brilliantly colored leaves, pumpkin lattes and the joy of having the holidays right around the corner. It’s a time for family, cuddling up with a good book and a blanket and also the ideal season to jump in to some of those craft projects you have been eyeing the past few months.
Here are 5 fun and festive DIY fall projects to try today!
1. Rhinestone Pumpkin Décor
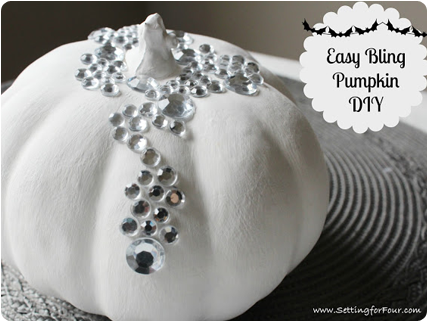 Decorating for Halloween is one activity that is just as fun for adults as it is for kids. With all the creepy options out there, where do you even begin? If you are an avid crafter, then you already know the many great options that await you. If you want to bling out your pumpkins this year, here is an amazing craft idea we love from SettingForFour.com!
Materials:
*Artificial pumpkins
*White craft paint
*Rhinestones
*Crafting paint brush
*Small scissors
The process is pretty simple! Paint your pumpkins with the white craft paint until you can no longer see the orange color coming through (you may need to do a few coats). This website suggests rhinestones that are prepackaged from the dollar store but for more glitz and glam, we suggest adding some European stones. You can choose from the many colors available and begin placing the stones all around the stem. Continue draping them down the front of the pumpkin in a necklace-type design. Now you have the perfect white ghostly pumpkin with a little bit of sparkle that you can use each year!
Source: http://www.settingforfour.com/2012/10/easy-bling-pumpkin-diy.html
2. Jazzing up Christmas Ornaments
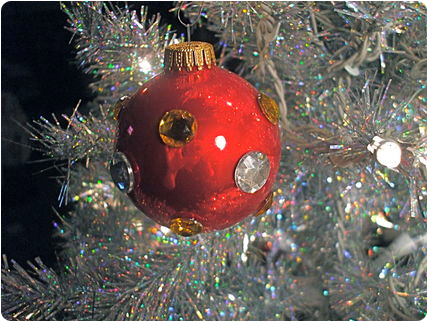 We all have them – those old Christmas ornaments that make their way to the tree each year. What they lack in sparkle, they make up for in memories but don’t you wish there was a way to bring back the old shine they once had? We found some great ideas on CraftyStylish.com for adding some rhinestone embellishment.
Materials:
*Old ornaments
*Markers
*Rhinestones of assorted shape and color
*Hot glue gun
Using a marker, plan a repeating pattern around the ornament, marking the spaces you will be placing each rhinestone. Try using an “A” mark and a “B” mark to indicate the alternating colors you would like to use. Be as creative as you would like here! You’ll be amazed when you see the difference that a bit of sparkle can make when breathing new life in to an old ornament. Once all your ornaments are marked in the patterns of your choosing, add a dab of glue from the glue gun on the dot and attach each rhinestone. Press it for a moment and then move on to the next. Once they are cool and dried, you are ready to add them to your tree!
Source: http://www.craftstylish.com/item/28271/resparkle-your-old-ornaments-round-one
3. Mason Jar Lid Ornaments
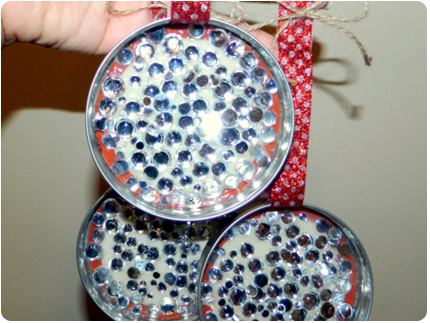 Getting crafty doesn’t mean having to spend lots of money! This great idea from SincerelyMoietsy involves many materials you have around your own home. This is a great project for after work or a long weekend as in it will take some time for glue to dry overnight. The original poster suggest 3 days.
Materials:
*Wide mouth half pint ball Mason jar lids
*Craft glue
*Modge Podge (glossy or satin)
*Brush
*Rhinestones
*Glitter tape
*Fiskars scissors
*Hole-punch
*Ruler
*Pliers
*Plastic sheet
First you will need to make the hanger for your ornament. Section out 9 inches of glitter tap and thread it through the lid’s metal band. Remove a section of the backing to bring the two side together, making a loop.
Next take the canning jar lid and put crazy glue around the raised edge of the disk on the shiny side. Place it inside the metal band and allow it to dry overnight. The next day, once the glue has dried, it’s time to add the rhinestones! The larger ones you can simply grab with your fingers but for the smaller ones you may want to pick them up with pliers. Apply Modge Podge Glossy glue to the inside section of the lid where you will be decorating. Start putting the rhinestones in the areas you would like to decorate and layer as much as you would like. Let it dry overnight once you are satisfied.
The next day take the Dimensional Glue and cover all the rhinestones. When it dries it will be shiny and clear. Use the whole puncher to create a hole at the top of the ribbon tape and make a bow out of twine to top it off.
Source: https://sincerelymoietsy.wordpress.com/tag/diy/
4. Homemade Napkin Rings
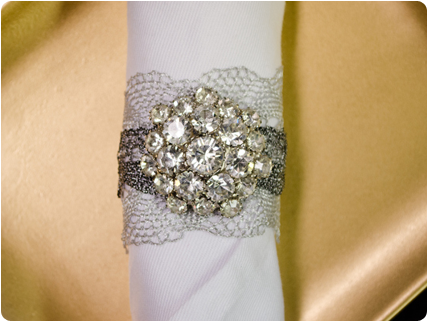 Decorating the table makes any meal a bit more festive! Try this genius idea for making your own homemade napkin rings. They have an antic old world feel that will bring a sense of class to every fancy lunch and dinner.
Materials:
*Metallic Lace (wide)
*Metallic Lace (thin)
*Rhinestone button (Or loss sew on rhinestones)
*Scissors
*Needle and thread
First start by placing the thin lace over the wide lace and wrapping them both together around the napkin in order to get the right size. Cut when you decide on the appropriate size. With the needle and thread, sew the ends together to create a circular napkin ring. With the seam in the back, sew the rhinestone button (or cluster of individual rhinestones if you prefer) to the front of the lace. It’s as easy as that!
Source: http://blog.mjtrim.com/2013/11/05/diy-napkin-rings/
5. Rhinestone Hair Pins
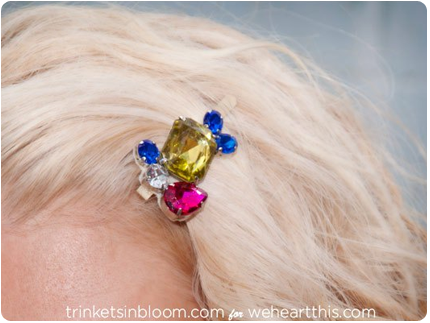 What’s a holiday party without the perfect festive rhinestone hair pin? Fortunately the folks at WeHeartThis.com developed a simple cure for a case of “blah” holiday hair!
Materials:
*Scissors
*Glue
*Bobbi Pin
*Felt
*Rhinestones
Before you get gluing, play around with different designs with your rhinestones. Once you decide on the one you like best, apply the glue to the back of each rhinestone and place them on felt in the design of your choosing. There will be a few spaces between the stones so add a bit of glue to the sides of each to stick them together in a solid design. Cut around the design, removing as much felt as possible so you will not be able to see it from the front.
Add glue to your flat bobbi pin and attach the felt. Now you have a great hair accessory!
Source: http://weheartthis.com/2013/11/12/diy-rhinestone-hair-pin/
Check out Rhinestone Shop for all your glitzy glam DIY projects!